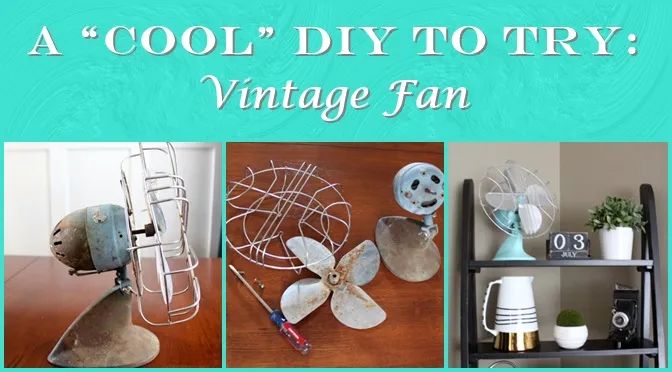
A “Cool” DIY to Try: Vintage Fan
Smack dab in the middle of a 99 degree summer day this DIY was just calling my name. I’ve had this vintage fan sitting in my living room since I grabbed it at an antique store around Christmastime. This July heat had me thinking it’s time to make it over. Here is how I did it…
Refinished Vintage Fan
Supplies:
- A well-loved, rusty fan
- Spray paint (I used Krylon’s Foil Metallic Silver and Aqua Color Master Paint + Primer in one.)
- Sandpaper or sanding block
- Screwdriver
Steps:
- Cut off the cord. While I love the look of the vintage fan, I wasn’t sure if it was safe to use or if it even worked.
- Clean the fan and sand the rusty areas until smooth
- Using a screwdriver, take as much of the fan apart as you feel comfortable doing. I wanted the cage and blades to have a fresh coat of silver and the base to be aqua. Another option would be to paint it all the same color or tape it off.
- Apply two coats of silver spray paint to the cage, blades and hardware. Make sure to allow time for it to dry in between coats.
- Apply two coats of aqua spray paint to the base and body of the fan.
- Put it all back together.
Fun variations:
- Paint it all one color for a modern look. Try oil rubbed bronze.
- Paint the blades gold and the rest silver for a mixed metal look.
- Use chalk paint for a more vintage feel.
This simple makeover gave new life to my thrifted fan in one afternoon’s time! Keep cool and craft on.

