

Easy Peasy Dinner Freezie
Is your freezer a scary dark tundra of unknown items that you chisel aside to make room for the ice cream? Do you despise all those organized people who are able to put a fabulous home cooked meal on the table every night despite their busy “soccer family” schedules? Now you, too, can say “don’t hate me because I’m organized!” With just a few simple steps you can remove the obstacles that prevent you from a “freezer friendly” life.The most common thing I hear from people is that they don’t have any room in their freezer even if they wanted to make and freeze meals for later use. Secondly, people tell me they put things in the freezer and they are all freezer burned and don’t look like anything they’d want to put in the oven! This waste is a big problem in freezing and can be a negative cost effect instead of a positive one. Lastly, people tell me they barely have time to make their regular meals much less make a whole bunch to freeze for later use. I am going to address these issues in three steps that will transform you into an “Easy Peasy Dinner Freezie” wiz!
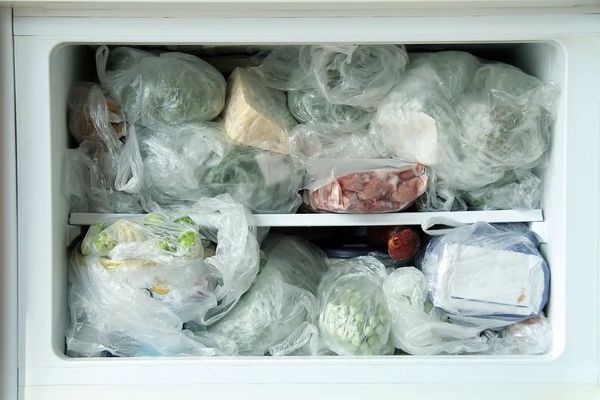
STEP 1: Clean Out Your Freezer!
Spend just one hour on a Sunday morning and pull everything out of your freezer. Some things freeze better than other things. Some packaging does a better job of protecting your food from freezer burn. You are probably going to find that most of the things in your freezer are already bad and should be thrown away. I’m giving you permission to chuck it out right now and start fresh! This liberating experience will give you the jump start you need to re-organize that freezer and get excited about your new “freezie” life.
Rules to restocking: Invest in some good quality freezer bags, just a couple boxes will do. Double bag liquid items like soups and stocks. Everything you put back should be sealed in a freezer quality bag and labeled with the item name and date. You think you will recognize that chicken cacciatore you just put in the freezer a month from now but trust me, freezing will make most things unrecognizable and they need a label. Also, your freezer is not a cryogenic storage time capsule. You should never freeze things longer than 3 months (my exception to this rule is storing spices which can be kept up to a year for optimum freshness but even then you need to be tossing and moving on). I sometimes use mason jars (often called “Kerr” jars) that are used for canning to store soups and stocks. The canning process is not required because you are freezing the item; they label easily, stack well, but will take longer to thaw.
Meats that freeze well: I always have some bone-in, skin-on chicken thighs, some chicken tenderloins, chicken breasts, and a roasting chicken (on our budget we eat a lot of chicken). Pork in any form freezes well so buy loins and chops on sale and freeze until you need them, but not too many at a time! Lamb also freezes nicely and can be purchased on sale, as well as wild game and anything in burger form. Again, think about what you are going to use and plan about a month’s worth of meals, selecting the meats you want to buy and freeze while they have a sale price or are in season. I personally do not freeze steaks and fish because they are generally more expensive to buy and so fun to pick up fresh on a day I have more time to make something special. On a tight budget, picking up a few steaks or some halibut is a real treat so have it fresh.
Tip: I am often using small amounts of chicken stock to add protein or flavor to my meals so, because my freezer already has an ice maker, I put the chicken stock into my ice cube trays for easy access and convenience. You do not need to cover the cubes because they are put in the quick chill area where ice cubes are usually kept and I only save them for about a month at a time. Just pop and use!
STEP 2: Review Your Family’s Schedule!
Convert your freezer to accommodate your lifestyle. There will be days when you have time to make a fresh meal with some frozen meats and veggies (fresh/frozen is not an oxymoron! If done properly, many frozen meats (like the ones I listed) and veggies retain their nutritional value and will be as good as picking it up that day.) If you have some time to bake something but not make it from scratch then use a premade frozen meal you put together. If you have a little more time, thaw the meat you’ve chosen and use it to prepare a fresh meal.
Rules to thawing: NEVER USE THE MICROWAVE TO THAW! EVER!! If you want your meat fresh and juicy you need to bring it back to its natural state as gently as possible. Best case scenario, you planned your meals a week in advance and transferred the meat you needed from freezer to fridge to thaw on a plate. If you are not this organized yet, you can thaw two ways. 1: Pick your meat that morning from the freezer and place it in a bowl full of water in your refrigerator. It will be thawed by the time you are home from work. 2: You just got home!! Pull out your meat and place in a bowl of warm water in the sink while continually changing the water as it chills. You should have mostly thawed meat in about a ½ hour and you can slice it for immediate use. Smaller pieces and ground meat will continue to thaw while cooking so make sure your meat is cooked thoroughly before moving on to sauces.
Tip: The number 2 “quick thaw” works well for grilling meats but grill at lower temps for longer than you think and use a meat thermometer.
STEP 3: Double Your Pleasure!
When will you have time to make all these fabulous freezer meals that you’ll magically remove from your newly organized freezer heaven? Double your pleasure. On the days that I have time to make a great meal like our favorite lasagna, my mom’s meatloaf, or Grandma’s mushroom chicken and rice casserole, I double the recipe and make two. We often think of only freezing left-over’s but by making two casseroles, or two meat loafs while you are making the original dish you will be using fresher ingredients and will have one to freeze that has not been cooked. It will taste just as good as the fresh one when you pull it out at a different time.
Rules for your frozen meals: Use smaller, disposable containers with proper labeling and bagging and you will have a successful freezer dinner every time. There are super-size freezing bags you can buy for larger dishes as well as disposable lasagna and bread size containers. It is well worth the purchase of proper freezing containers because it will save you so much time and money in the end. Remember to label and date!! Cook your frozen dish uncovered because there will be a lot of moisture released as it cooks and thaws and you don’t want the excess moisture to build up and change the original composition of your dish. Most frozen dishes will cook just fine on 350 degrees for about 45 minutes. Again, you can use a meat thermometer to test the heat of the center of your dish and refer to the original recipe for doneness.
Tip: When you take a meal out of the freezer, always put in the oven right away! You don’t want your meat dish sitting on the counter for hours thawing and it’s not necessary.
Now you are ready to freeze like a pro. Fear your arctic freeze no longer and happy eating!