

New Year, New Skill: Learn to Perfectly Wrap a Present in 5 Easy Steps
With the dawn of each New Year we draft new resolutions—large and lofty plans for bettering and improving ourselves. Some of us will be successful, and some of us, come January 31, will simply pretend we did nothing of the sort. One of my resolutions for 2013 is to become the greatest domestic goddess that ever was. Practical, I know.I recently had the opportunity to sit down with local business owner Catherine Young (Marcasa Clothing and Kibler and Kirch)—a goddess in her own right—to discuss gift wrapping techniques. Lucky for you guys she was a plethora of information; previously my so-called wrapped gifts looked a bit like I had backed over them with a truck, but now I can say bring on Valentine’s Day and Christmas 2013. No more gift bags and tissue paper for me, I’m ready to wrap y’all!
Step One: You will want to choose a clear, clutter-free workspace, perhaps your kitchen table. Gather and lay out all of your supplies (ribbons, wrapping paper, scissors, tape, and gift boxes).

Catherine says, “You usually don’t need as much paper as you might think. Don’t be afraid to cut your paper as needed.”

Step Two: Place the box upside down on the sheet of wrapping paper. Fold the paper across the box, about half to 2/3 of the way across. Secure the paper with one piece of clear, “gift wrap” tape—one to two short pieces of tape is usually plenty. “You want the paper to show, not the tape,” she says.

Repeat so that the entire box is covered, but FIRST make sure you fold the edge of the paper into a nice, straight line. Catherine points out you can always buy wrapping paper with “cheat lines”. Score! I didn’t know this was even an option.


Step Three: Position the box (still bottom side up) so that the edge you are working on is away from your body. This will give you plenty of space to move your arms. Using your fingers, fold in the sides of the paper to create an angled crease.

Step Four: Take the upper flap and fold it downward to meet the bottom edge of the box. Optional: apply a small piece of tape.

Fold the bottom flap a tad to create a nice clean, sharp edge.

Lift it up, holding it as taut as possible.

Keep your tape dispenser handy! Apply 1-2 pieces of tape to the edge of the flap to hold (depending on the size of the box of course). Catherine tells us, “It should look nice and neat!” Turn the box around and repeat on the other side.

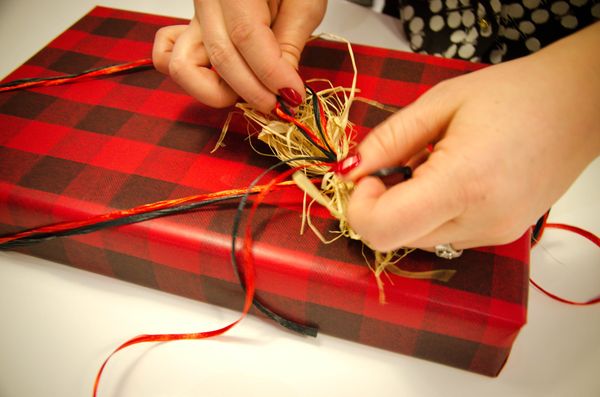
Step Five: Your ribbons can either match or contrast with your paper, your choice. How much ribbon you will need depends on the size of your box. With a box this size, Catherine advised using either one grosgrain ribbon or two thinner pieces of raffia.

Make sure you have plenty of ribbon to go around the box once. Lay the ribbon diagonally across the box (one corner), pass underneath the box, and back over to the opposite corner. Tie a knot.


Gather a small cluster of natural raffia into your hand. Place the cluster on top of the ribbon, and tie another knot. Finally, tie a bow as if you were tying a shoelace.


Catherine warns, “Don’t feel like all of your wrapping papers have to be matchy matchy, even during the holidays—you just want your papers to coordinate under the tree. And hopefully your ribbons will match with everything.”

