To Carve or Not To Carve
Despite my many years of ballet training, I have always been a bit of a klutz. Growing up, I regularly sprained my ankle—in fact I hurt my ankle at least once a year, every year that I was in college. (One time I was crossing the street in the rain on my way to class and I wiped out in the median and had to be picked up and driven to the nurse). I run into furniture like it’s my job (I currently have an ingrown nail from repeatedly stubbing my toe), and generally my husband does all the chopping in the kitchen (let’s just say I have had a few close calls).For the safety of all parties involved I have never been a big pumpkin carver. I am usually the one baking cookies, observing the carvers from a safe distance at Halloween gatherings. Then last year I finally decided I was tired of missing out on all of the fun: armed with my own miniature pumpkins, a couple of bottles of metallic acrylic paint, and several brushes, I arrived at my Bible Study’s annual pumpkin carving party ready to get down to business. I decided to skip over the whole knife-wielding drama, and instead simply sponge painted my little pumpkins gold and silver. I was quite pleased with the outcome, and vowed to repeat the craft again this Fall.
Of course that was before finding all kinds of fantastic alternative pumpkin decorating ideas on Pinterest. This year, this domestic diva wannabe is going to have the rockingest gourds on the block. I’ve rounded up five of my favorite, simple and easy web tutorials to get us in the festive spirit. (Hopefully you don’t live on my street.) See you at the pumpkin patch!
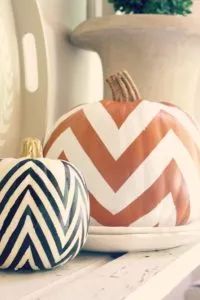
Chevron Pumpkins
(adapted from http://mysweetsavannah.blogspot.com)
What you will need: a pumpkin (keep in mind foam is reusable), painter’s tape, and either spray paint or latex craft paint in the color(s) of your choice.
Simply mark off the pumpkin, using the painter’s tape, in the popular zig zag pattern. Spray or hand-paint your pumpkin as desired. Once dry, remove the tape and voila!
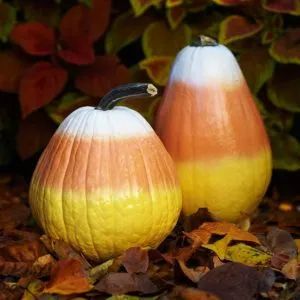
Candy Corn Pumpkins
(adapted from www.bhg.com)
What you will need: cone shaped pumpkins and spray paint (orange, yellow, and white).
No matter your crafting skill level, you should be able to freehand paint this design. Candy corn doesn’t have to look perfect; it just has to look tasty!
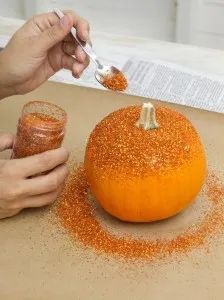
Glitter Pumpkins
(adapted from www.hgtv.com)
What you will need: a pumpkin, colored glitter, a spoon, spray adhesive, craft and newspaper.
First, prepare your work area. Put down a layer of newspaper followed by a layer of craft paper. Cover the areas you want glittered in spray adhesive. While the glue is still wet, apply the glitter using the spoon. Set aside to dry. Once dry shake off the excess glitter. Your sparkly pumpkin is now front-stoop ready!
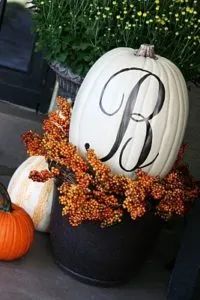
Monogrammed Pumpkins
(adapted from http://radiobutlers.blogspot.com)
What you will need: a pumpkin, spray paint (in the color of your choice), transfer/graphite paper, acrylic paint and brush, optional clear spray enamel.
This pumpkin has a few more steps, but the outcome is well worth the extra effort. First, spray paint your pumpkin (this will be your base color). Next, create a monogram on your computer. (The font pictured is Ecolier.) Make sure you adjust the size of the font as desired. Use font options/effects to make your letter an outline (this will save you printer ink). Print the monogram and locate your transfer/graphite paper for the next step. Position the monogram on the pumpkin where you would like it and tape it in place, with the transfer/graphite paper underneath. Trace over the entire monogram (with a pencil) and then fill in with the acrylic paint. The last step is optional: if your pumpkin is going to be out in the elements, you may want to apply a sealant with the clear spray enamel. That wasn’t too hard, was it?
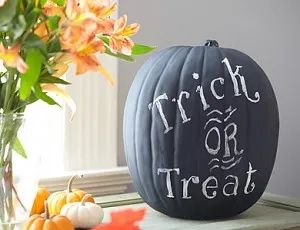
Chalkboard Jack-o-Lantern
(adapted from http://feelinglovesome.blogspot.com)
What you will need: a pumpkin, chalkboard paint, and chalk.
For your inner artist: spray paint your pumpkin and you are ready to draw! This would be great for younger children, too. Once Halloween is over, wipe off Jack’s funny face and create something more November appropriate.
Want more inspiration? For additional pumpkin decorating ideas (including a cute pumpkin caterpillar for your front yard display), check out this slideshow from Better Homes and Gardens.

