
Fall Wreath DIY: Step-by-Step
Oh Fall! It always comes at the perfect time - when we are all a little tired of the heat and ready for the air to turn crisp and cool. The season for curling up with a good book and looking out at the changing leaves. The only problem is, it doesn’t last nearly long enough! In the spirit of pumpkin spice lattes and natural outdoor elements, I’ve created a cotton wreath with natural elements reminiscent of a soft white throw.Related: Fall Decorating DIY: Pumpkin Decorating
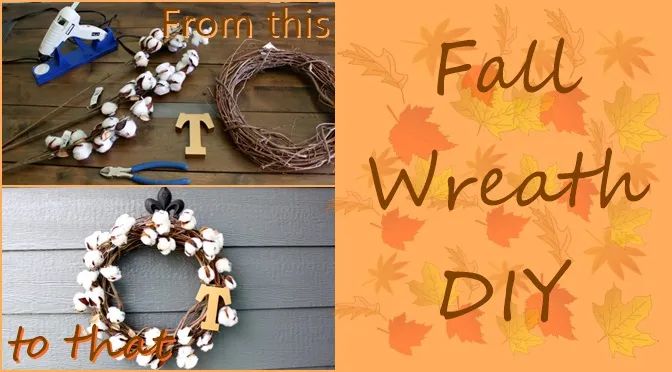
Fall Wreath DIY: Step-by-Step
Supplies:
- Grapevine wreath (round or oval and any size you like)
- Cotton branch stems (I used 3 for this project)
- Hot glue gun
- Gold monogram letter
- Wire cutters
Assembly (easy as 1, 2, 3):
- Cut apart cotton branches
- Arrange them all going in one direction around the wreath leaving room for the monogram letter.
- Glue cotton and monogram letter into place.
That’s it! Now it’s time to sit back, relax, light a candle and enjoy your neutral, beautiful wreath while you sip on your favorite hot fall beverage. Enjoy transforming your home for the season by bringing simple outdoor elements in.
Fun variations:
~ Use the wreath as a charger for the center of your table with a glass hurricane and candle. Wrapping cotton branches all the way around and skipping the monogram.
~ Create napkin holders by cutting the cotton branches and wrapping them around napkins.
~ Tie a burlap or lace ribbon at the top to hang wreath from.
Stay tuned next month for more Fall DIY inspiration from Simply Stephanie and Simply Family Magazine!