
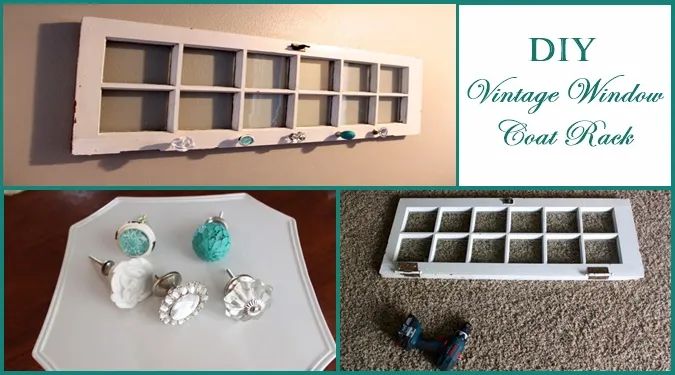
DIY Vintage Window Coat Rack
I just love vintage finds! Thanks to a friend, I scored this hundred year old window that I have had hanging in theplayroom for a few years all by itself. I decided it was time to change it up and give it a new purpose…a coat rack. With just a few supplies the transformation was super simple. Here’s how to create your own.
DIY Repurpose: Vintage Window Coat Rack
Supplies~
- Old window (check garage sales, re-store and antique markets for one)
- Decorative knobs or hooks (use different ones for a fun, eclectic look)
- Drill and drill bits
- Picture hangers
Steps~
- Remove window hardware
- Measure and mark where you plan to drill holes for the knobs
- Use a drill bit similar in size to the knobs end to drill pilot holes
- Screw the knobs in place and secure on the backside using the washer and nut included with knobs.
- Attach picture hangers to back side and you’re ready to hang. Make sure to use strong enough hangers to hold the weight of the window.
I love the new life this gorgeous old window has. There are so many fun ways to decorate with old windows!
- Try painting the glass with chalkboard paint and use it as a message board.
- Print off pictures and cut them to the size of the glass panes for a unique photo display.
- Blow up a picture to the size of the window and display inside.
- Why not break out your favorite modge podge and fill the panes with scrapbook paper or fabric for a pretty art piece?
Use your imagination and repurpose your own vintage finds! Share your favorite repurposed projects in the comments below.