
Kids' wall art display, easy as 1, 2, 3 (and almost free!)
You know all those adorable things your kids bring home from school? That wasn't sarcasm, I mean really adorable, not runny noses and 'tudes. I'm talking about those paintings of you holding your kiddo's hand, or those first handwriting practice worksheets, or the first 100% on a spelling test. Here's a really cute way to display them on your wall. Not only is it really easy, it's also cheap, and used of mostly recycled materials. Here's what you'll need:- A pile of artwork (not hard to come by, if you have school-age kids);
- Clothespins;
- 5 strips of wood, 1 about six inches longer than the other 4;
- Wood glue;
- Staple gun.
Step 1:
Figure out what kind of wood you want to use. I used pieces of wood pallets that my husband stockpiles in our garage. 2X4's would work too, as would trim pieces or plywood. If your garage looks like ours, wood pieces won't be hard to find! Form a frame with the pieces. I overlapped each edge to give each pinned piece of art a little more display area.

Step 2:
Connect the pieces with wood glue and/or a staple gun. I started with wood glue and ended up using both for added strength. Glue the clothespins at the appropriate places on the frame to display the artwork.

Step 3:
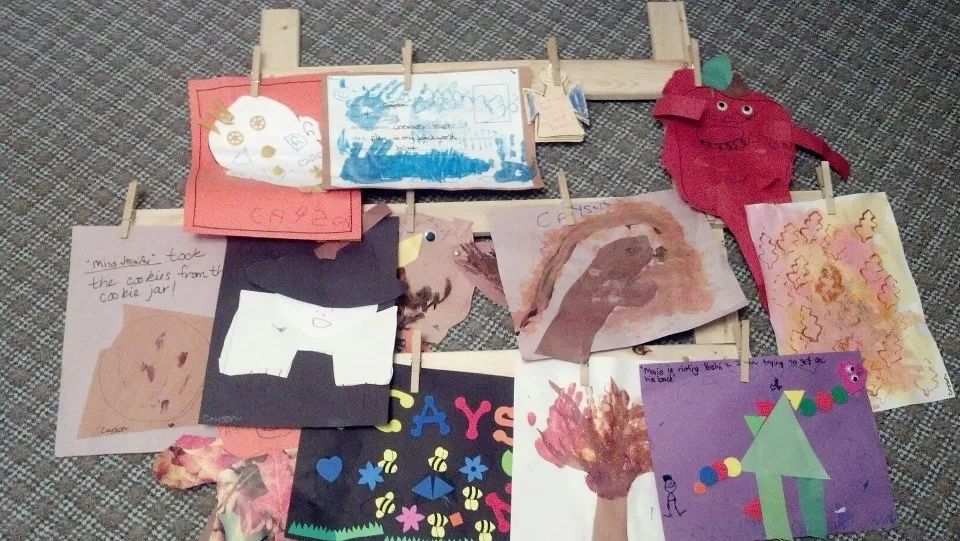
Dry completely. Then sort through your pile-o-papers and select the ones you wish to display first. Another great thing about this display is that you can change the artwork with the season, as new items come home, or just let your kids pick their current favorites.

See, I told you it was easy!
You can also customize this project in so many ways. Paint the wood pieces in coordinating colors and have fun painting the clothespins (they show the most!) Let your kids get creative and paint them with faces, patterns, or paint their names on each clothespin.
Good luck and have fun! And don't forget to check out the March print edition of Simply Family for more ideas to creatively use your kids' artwork!