
Self-Preservation - A Step by Step Guide to Canning Blueberry Jam
Self-PreservationI desperately want a green thumb; I come from a long line of gardeners and growers of all-things amazing! Sadly, I am on the shallow end of that gene pool. This year I decided that I was going to take the bull by horns (or the manure pile) and get to growing.
I learned a few things about growing a garden: not all soil is created equal; a fair amount of cooperation from the sun and rain department is necessary, as well as a fair amount of patience. I’ve had plenty of sunshine, not enough rain and apparently my soil is well-suited to all kinds of weeds.
All that to say that the only thing I’ve managed to grow, is fungus on my cheese, a pot of rosemary (that sits inside on my counter) and three, scraggly potato plants, that are so puny I can’t imagine they’ll produce anything…
Thankfully, I can go over to my parents’ house and raid their garden; it’s gorgeous and full of fun things to eat! I’ve decided that if I can’t master growing veggies, I WILL be the best veggie preserver the world has ever known; now all I have to do is figure out where to start.
Fast-forward a couple of weeks....
My awesome friend (and fellow SFM writer) is Super-Mom, she grew up on a farm, and is a food preserver extraordinaire. She called me, and told me that she had a flat of blueberries that were just itching to become jam. She wanted to know if I was interested in learning how. Oh boy was I!
Without Further Ado.....
Blueberry Jam
Here's what you'll need:
Ingredients
3 pints of blueberries rinsed and stems discarded
4 cups of sugar
1 package of Sure-Jell fruit pectin
1/2 tbsp of butter
Equipment
2 Mixing Bowls
Potato Masher
Canner (big pot with a lid)
tongs
jelly jars* (put the jars and rings into your dishwasher on the sanitize cycle; this ensures that all the cooties are DEAD)
jar rings *
jar seals (always use new seals)
Sauce pan
measuring cups
reliable timer
Now for the fun part
Set your canner on the stove, with enough water to cover the jelly jars with 1-2 inches of water, cover and bring to a boil.

Rinse and stem your blueberries

While your water is heating, grab your trusty potato masher and begin crushing the berries ( this is a great job for kids, as it makes grown-up arms really tired.) You will need four cups of crushed berries.

Measure out exactly (emphasis on exactly) 4-cups of sugar into a mixing bowl and set aside.

In a large pot on the stove bring the berries, pectin and butter to a rolling boil (this is when the bubbles continue while stirring.) When the berries are hopping out of the pot, add the sugar and return to a rolling boil.


When the mixture returns to a boil, set your timer for ONE minute. Let the berries bubble, and stir constantly, just a note, these babies really pop, so make sure you put on your bionic arms because there is a large possibility that you'll get blueberry burns. While you're worrying about 3-degree burns and stirring until your arms hurt, make sure your ears are listening for the canning water to come to a boil.
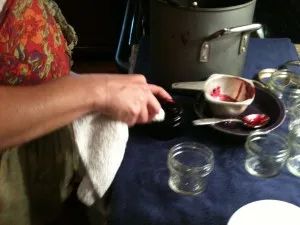
If I learned anything while making this jam, it is that timing is essential. After your minute of stirring, move your berry mix off of the heat and onto the counter, set out your jars and rings, and in another small pan, boil the seals so they're ready to go.


With a small funnel, ladle in enough jam to come to within 1/8th of an inch from the top of the jar. Wipe the lip of the jar and the threads and place a boiled seal on to the top of the lid. Screw on the rings, making them snug. Take your jar lifter and place the jam into the canner. Continue this process until the canner is full, and all of your jars are cooking.

The next part is the important stuff, make sure that the jars are covered with 1-2 inches BOILING water, and let them process for 10-minutes. Another piece of information that I didn't know, was that processing times are specific to your elevation. To make sure that your food is sealed and preserved safely, check out the Montana State University-Extension website. It has tons of recipes, elevation charts and links to other great resources.
For Billings, because our elevation is around 3100 feet above sea-level, we added 10 more minutes to our processing time. After they process, set them out on the counter and wait for the seals to "pop" this means that they're vacuumed closed and the jam will start to set up.

If you have any left over, that didn't fit into the jars, put it in a ziplock, throw it in the fridge and eat it on your toast in the morning.

I think the jam was a hit!